OVEN BUILDING - DAY TWO
 This is how our project looked when we started work this morning (left)...
And this is how it looked when we knocked off this afternoon - three layers of cinder blocks filled with what felt like tons of hand dug and hand carried sand, gravel, and mud. I can say this with total confidence: this foundation is not going anywhere! We use this building technique:
1. Consult the book, perhaps reading the pertinent points aloud.
2. Discuss what we read and make a plan, tempering what we SHOULD be doing with what we are CAPABLE of doing and have the materials and energy to do.
3. Do it. Then, back to the book for consultation.
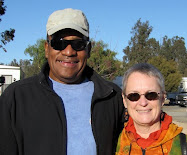
Here Odel and I are admiring the perimeter of our foundation. The cinderblocks we discovered yesterday are great for this purpose - heavy and solid. Searching the yard, we found enough cinderblocks to build three layers, which will raise the oven to a comfortable working height. Our building materials - gravel, sand, and clay - all come from the immediate area. When we need more gravel or sand, we load kitty litter and animal feed buckets into the back of the pickup, along with gloves and shovels, and drive a mile down Cottonwood Road, Rosanna's street, to a spot where the road crosses a wash.
On one side there are piles of gravel; on the other side there is a low spot where high quality sand has collected.
The mud comes right out of the ground on Rosanna's ranch. This is really, really, lucky, because it is HEAVY and we need a LOT! In between the heavy work of hauling materials, we take occasional breaks to experiment with materials. The proper "mud" for the oven itself is judged like this:
After making a mix of clay (one part), sand (two to four parts) and water (enough to make a firm dough; this is trial and error), pack a firm, hard ball of dough. Drop it from shoulder height.
A hard packed ball shouldn't shatter when dropped from shoulder height. If it shatters, it needs more water or more mixing. If it flattens into a smooth pancake, it is too wet. If it neither flattens nor shatters, it is perfect.
Check out our perfect clay domes, top and bottom. The one in the middle is a little flat disk with a bit of clay "slip" applied to the surface. We are so happy with our "mud" - now we just need to prepare TWELVE five gallon buckets of the stuff.
Tomorrow we will work in a totally different medium: sawdust (gleaned from neighbor Marvin) mixed with clay slip (a clay/water mixture that is the texture of heavy cream). The wine bottles you saw up top? Those provide insulation between the oven floor and the cold ground; the sawdust and clay slip mixture will provide an insulating "dough" that will surround the wine bottles and hold them in place.
It's all coming together, amazingly.


Wow, I am really impressed with the solid foundation and the amount of work that you are all doing, and all of this WITHOUT Auntie Carol to even cook meals for you!
ReplyDeleteI am soooo sorry I am at a painting workshop in Scottsdale and thus cannot help lug large buckets of mud around. I will, however, be back in time to test products baked in there......
Love, Sydney